突然发现,之前还有个JavaFX游戏开发 第一课。不过,这两个教程并不冲突。目前这个系列是做一个完整的打砖块游戏。
第一课主要用到的知识有,JavaFX的动态绑定,Rectangle的使用,简单的MouseMove事件,BoxBlur特效。
那么,我们首先创建一个名叫BrickBlock的JavaFX Project。本人是使用的e(fx)clipse进行开发的。
e(fx)clipse的官方网站为:http://www.efxclipse.org/,下载整合插件的eclipse即可。
首先创建一个游戏对象的基类BaseObject,继承于Parent。
import javafx.beans.property.DoubleProperty;
import javafx.beans.property.SimpleDoubleProperty;
import javafx.scene.Parent;

/**
 * @author wing
 * @date 2012/7/26
 */
public abstract class BaseObject extends Parent{
    protected DoubleProperty widthProperty = new SimpleDoubleProperty(0);
    protected DoubleProperty heightProperty = new SimpleDoubleProperty(0);
    protected DoubleProperty xProperty = new SimpleDoubleProperty(0);
    protected DoubleProperty yProperty = new SimpleDoubleProperty(0);

    public  DoubleProperty widthProperty() {
        return  widthProperty;
    }
    public double getWidth(){
        return widthProperty.get();
    }
    public void setWidth(double width){
        this.widthProperty.set(width);
    }

     public  DoubleProperty heightProperty() {
        return  heightProperty;
    }
    public double getHeight(){
        return heightProperty.get();
    }
    public void setHeight(double height){
        this.heightProperty.set(height);
    }

    public  DoubleProperty xProperty() {
        return  xProperty;
    }
    public double getX(){
        return xProperty.get();
    }
    public void setX(double x){
        this.xProperty.set(x);
    }

   public  DoubleProperty yProperty() {
        return  yProperty;
    }
    public double getY(){
        return yProperty.get();
    }
    public void setY(double y){
        this.yProperty.set(y);
    }

    public void moveX(double x){
    	this.xProperty.set(getX() + x);
    }

    public void moveY(double y){
    	this.yProperty.set(getY() + y);
    }

    public boolean isCollisionWith(BaseObject baseObject){
    	if(getX() + getWidth() > baseObject.getX() && getX() < baseObject.getX() + baseObject.getWidth() && getY() + getHeight() > baseObject.getY() && getY() < baseObject.getY() + baseObject.getHeight()){
    		return true;
    	}
    	return false;
    }

}
可以看到,基类BaseObject中,包含有坐标和宽高的属性,并且还有一个检测碰撞的isCollisionWith方法。
大家可以看到,基类BaseObject中没有使用常规的数据类型,而是使用的DoubleProperty。而DoubleProperty这样
的类型,也正是JavaFX中的动态绑定的机制,set get方法只是改变DoubleProperty的值。
为了方便,isCollisionWith只是简单的矩形碰撞。
下面我们创建一个打砖块中底部拦截的游戏对象类MainBrick。
import javafx.scene.effect.BoxBlur;
import javafx.scene.input.MouseEvent;
import javafx.scene.paint.Color;
import javafx.scene.shape.Rectangle;
import org.wing.game.BrickBlock;

/**
 * @author wing
 * @date 2012/7/25
 */
public class MainBrick extends BaseObject{
    private Rectangle mRectangle;
    private BoxBlur mBlur;
    public MainBrick(){
        mRectangle = new Rectangle();
        mRectangle.widthProperty().bindBidirectional(widthProperty());
        mRectangle.heightProperty().bindBidirectional(heightProperty());
        mRectangle.xProperty().bindBidirectional(xProperty());
        mRectangle.yProperty().bindBidirectional(yProperty());
        mRectangle.setArcWidth(20);
        mRectangle.setArcHeight(20);
        mRectangle.setFill(Color.YELLOW);
        mBlur = new BoxBlur();
        mBlur.setWidth(5);
        mBlur.setHeight(5);
        mRectangle.setEffect(mBlur);
        setWidth(150);
        setHeight(25);
        getChildren().add(mRectangle);
    }

    public void onMouseMove(MouseEvent event){
        if (event.getX() >= getWidth()/2 && event.getX() <= BrickBlock.WIDTH - getWidth()/2) {
            setX(event.getX() - getWidth()/2);
        }
    }

}
MainBrick中的代码也很简单。
1.创建了一个Rectangle,这里使用了bindBidirectional方法,这个方法在JavaFX中的意义是双向绑定,只能对Property使用。
我们将Rectangle的宽度,高度,坐标与基类的属性进行了双向绑定,也就是说整个MainBrick已经是一个Rectangle了。
2.设置Rectangle的圆角,让它成为一个圆角矩形。
3.创建了一个BoxBlur效果,通过setEffect给Rectangle设置BoxBlur效果。
4.设置MainBrick的宽度和高度,由于进行了双向绑定,在这里setWidth,setHeight属性将会同步更新到Rectangle的width和height属性。
5.这里还有一个onMouseMove的事件,主要是让Rectangle跟着鼠标动,通过判断使矩形不会超出左右边界,并且将Rectangle中心与鼠标对齐。当然,这个事件现在是不能执行的。
接下来,我们创建一个游戏场景类GameScene,继承Parent。
import org.wing.game.object.MainBrick;

import javafx.animation.KeyFrame;
import javafx.animation.Timeline;
import javafx.event.ActionEvent;
import javafx.event.EventHandler;
import javafx.scene.Parent;
import javafx.scene.input.MouseEvent;
import javafx.scene.paint.Color;
import javafx.scene.shape.Rectangle;
import javafx.util.Duration;

public class GameScene extends Parent {
    private int width, height;
    private Rectangle background;
    private MainBrick mainBrick = new MainBrick();

    public GameScene(int width, int height){
    	this.width = width;
    	this.height = height;

    	initGameObjects();
    }

    private void initGameObjects(){
        background = new Rectangle(0, 0, this.width, this.height);
        background.setOnMouseMoved(new EventHandler<MouseEvent>() {
            @Override
            public void handle(MouseEvent event) {
                mainBrick.onMouseMove(event);
            }
        });
        background.setFill(Color.BLACK);

        mainBrick.setX(0);
        mainBrick.setY(height - mainBrick.getHeight());

        getChildren().add(background);
        getChildren().add(mainBrick);
	}
}
在游戏场景类GameScene中,我们通过构造函数,传入场景的宽度和高度。
然后创建了一个背景Rectangle。
设置Rectangle的onMouseMove事件,在其中执行MainBrick中我们刚才写的onMouseMove函数。通过setFill将Rectangle的填充色设为黑色。
接下来,将MainBrick的作为设置为屏幕最下方。
最后,通过getChildern().add()将背景Rectangle和MainBrick添加进GameScene中。
最后就是我们的JavaFX Main Class了。
import javafx.application.Application;
import javafx.scene.Scene;
import javafx.stage.Stage;
/**
 * @author wing
 * @date 2012/7/26
 */
public class BrickBlock extends Application {
    public static final int WIDTH = 800;
    public static final int HEIGHT = 600;
    public static void main(String[] args) {
        launch(args);
    }

    @Override
    public void start(Stage primaryStage) {
        GameScene  root = new GameScene(WIDTH, HEIGHT);
        primaryStage.setTitle("BrickBlock");
        primaryStage.setScene(new Scene(root, WIDTH, HEIGHT));
        primaryStage.show();
    }
}
大家可以看到,由于将游戏对象和游戏场景都分离出来,主类已经变得很简洁了。
那么我们运行运行看看效果。
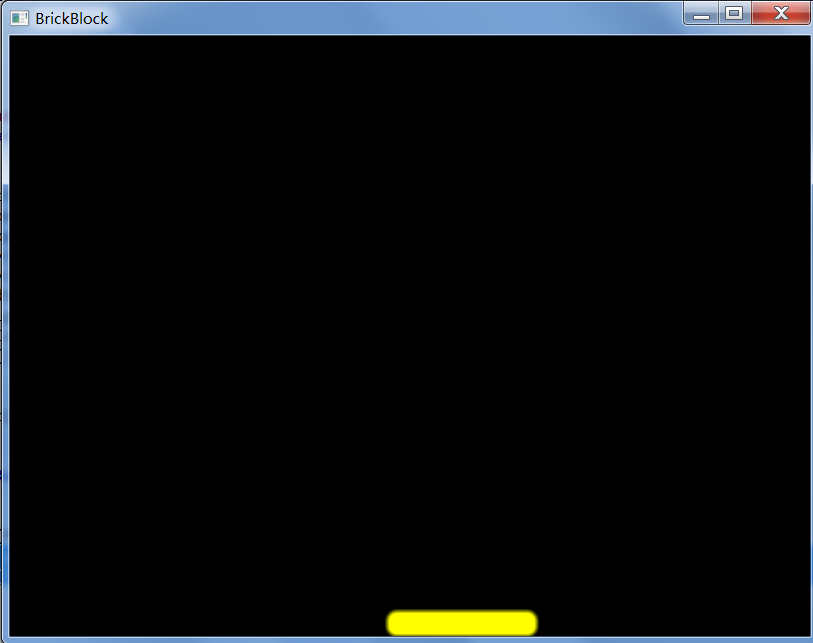
图中的黄色的砖块会跟着鼠标移动,并且不会超过左右的边界。(截图看不到鼠标...)
看似效果很简单,不过我们整体的结构已经差不多了,这将有利于我们后续的开发。
在第二课中,我们将会增加一个小球在这个空间中弹来弹去,并且可以与图中的黄色砖块进行碰撞。
转载请注明出处:http://blog.csdn.net/ml3947/
分享到:


相关推荐
JavaFX战旗类游戏开发示例,建议结合我的博客文章《JavaFX战旗类游戏开发》来看。该系列七课已完结,有问题可以发我邮件。
此源码是本人从网上购买,他人所写(可以在http://lustrezhang.gotoip4.com/fxgame/这个地址看效果,另外里面还有一个关于javafx的书籍和一些java的书籍,提供学习)如果你觉得不想给分我也可以,你进入...
使用javafx开发的游戏,eclipse工程,可直接运行
主要为大家详细介绍了javafx实现五子棋游戏,具有一定的参考价值,感兴趣的小伙伴们可以参考一下
javafx用户界面设计
用JavaFX技术开发的贪吃蛇游戏
javaFx开发的炫酷浏览器,适合毕业做毕业设计的同学参考,也适合做javafx的开发人员参考
javaFX Demo 模板案例
一个javafx 2.0做的桌面游戏。存在大量BUG,仅供学习。
此源码是本人从网上购买,他人所写(可以在http://lustrezhang.gotoip4.com/fxgame/这个地址看效果,另外里面还有一个关于javafx的书籍和一些java的书籍,提供学习)如果你觉得不想给分我也可以,你进入...
这是一个利用javaFX编写的一个小游戏,里面的内容是本人为了打好精神,才那样写的,如有不妥之处还情见谅,谢谢合作!
JavaFx富客户端开发实例,很全的PDF资料 对于学习RIA的朋友来说这是一本很好的入门和提高书籍
使用JavaFX实现了一个Mario游戏.zip使用JavaFX实现了一个Mario游戏.zip 使用JavaFX实现了一个Mario游戏.zip使用JavaFX实现了一个Mario游戏.zip 使用JavaFX实现了一个Mario游戏.zip使用JavaFX实现了一个Mario游戏.zip...
用JavaFx开发的模仿Windows的画图板工具
JAVAFX第一张学习笔记,第一张的学习源代码!
JavaFX2开发教程 学习的好资料、适合刚刚接触的朋友哇
基于JavaFX的抽象Java游戏库 Abstract Java game library based on JavaFX. 基于JavaFX的抽象Java游戏库 Abstract Java game library based on JavaFX. 基于JavaFX的抽象Java游戏库 Abstract Java game library ...
javafx
java游戏开发项目 提供源代码参考 java游戏开发项目 提供源代码参考 java游戏开发项目 提供源代码参考 java游戏开发项目 提供源代码参考 java游戏开发项目 提供源代码参考 java游戏开发项目 提供源代码参考 java游戏...
Sun公司已于2008年12月05日发布了JavaFX技术的正式版,它使您能利用 JavaFX 编程语言开发互联网应用程序(RIA)。该产品于2007年5月在JavaOne大会上首次对外公布。JavaFX技术主要应用于创建Rich Internet ...